
Where it all started
For over 20 years now I have been cooking turkeys in a garbage can… What started it all you ask…
In the fall of 2000 I was attending the Moosehorn International Camporee an event put on by the Boys Scouts of America (BSA). The event was hosted at the Moosehorn National Wildlife Refuge outside of Calais Maine. As a young adult leader, I was eager to learn what I could from the trip. The BSA had many different traditions than Scouts Canada and one of them at this camp was a “Leader Cook-Off”. The event was awesome…. Leaders from all over the USA cooking, using all kinds of methods I had not seen. Cast iron dutch ovens, tripods, charcoal chimneys, lump charcoal, rebar with columns of chicken wire filled with charcoal briquettes but the most intriguing was a group cooking in a garbage can!
These leaders were using a combination of pails, foil and charcoal to cook a turkey in the woods! As most who know me well are aware, I like to ask questions… well I spent probably 20 mins talking to this group of leaders to understand how they were doing it. Through this time they shared tips, tricks and key steps to success.
The first attempt
Returning home I was keen to put my new teaching to use…. The following month the opportunity presented itself! We were attending a camp with our group and I decided to try making garbage can turkey for the troop!
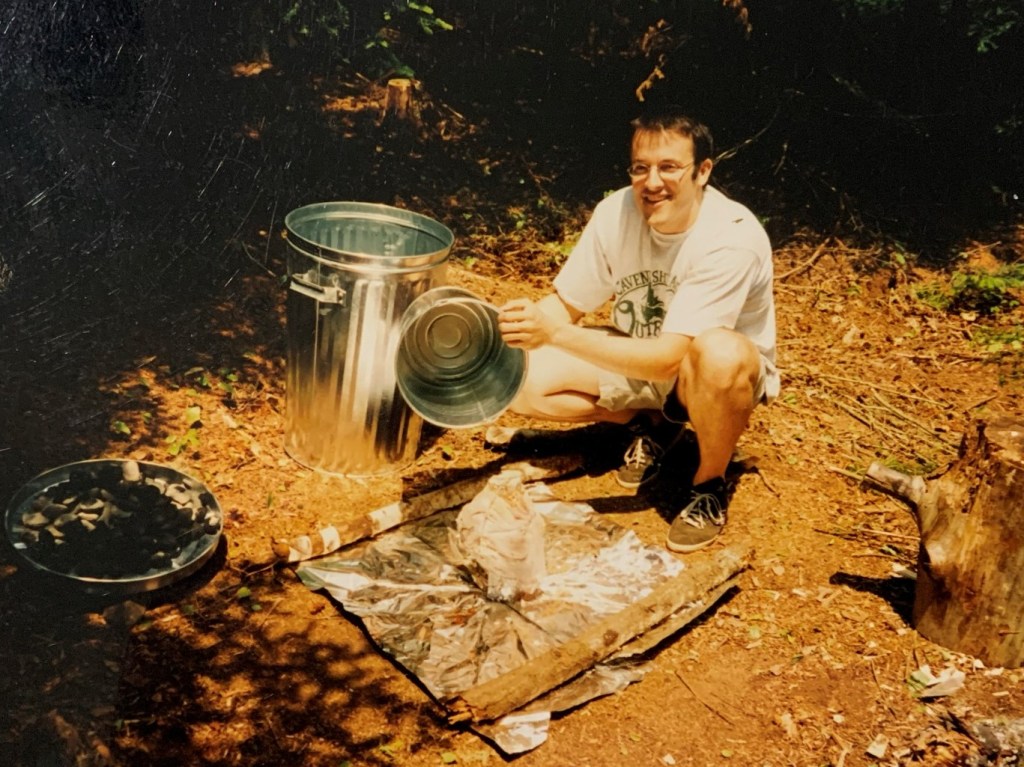
Off we went with a turkey in the cooler, a shiny new garbage can, new pail, some string, some foil and a bag of charcoal! The scouts were convinced that this project was going to be an epic fail… we spent the afternoon getting set up and following the guidance of my American colleagues (as best I could remember) it was time for the reveal…. To be honest I wasn’t sure exactly how this thing was going to turn out either. With a group of doubtful teens and unsure leaders looking on, I lifted the garbage can off and pulled back the charcoal from the bottom of the inside pail. Using oven mitts I lifted the bucket slowly only to reveal the best looking turkey I had ever cooked! The kids both young and old were amazed at how things turned out! Little did I know that moment started annual tradition that has continued for over twenty years!

Turkey at the camp
Thanksgiving turkey dinner outdoors at my father-in-law’s camp with the backdrop of fall foliage at its peak… What started as a scouting activity quickly became an annual family tradition. The first year was a bit rocky as I felt the pressure of so many onlooking family members! Needless to say I made a few mistakes but did eventually get the bird cooked and it was tasty! From that point forward, it became a day that we all looked forward to. In the early years we kept a log of things that went well and things to improve… the technique and tips outlined below are a summary of my experience cooking almost 50 turkeys this way over the years.
Equipment/Items Needed
- 70L metal garbage can (see notes)
- 25L stainless steel bucket
- One 2×2 18” long wooden stake with one end pointed/angled
- Heavy duty aluminum foil (wide roll)
- Hammer or axe
- Butchers twine
- 2 charcoal chimneys
- Large bag of Charcoal (preferably briquettes)
- 4 bricks
- Oven proof mitts
- Tongs
- Olive/Canola Oil
- Material to start charcoal (egg carton/birch bark/paper)
- 1/4 cup (or more) Cajun Seasoning (I use Emeril’s Essence – the recipe can be found below)
- Ingredients for brine (see below)
The Process
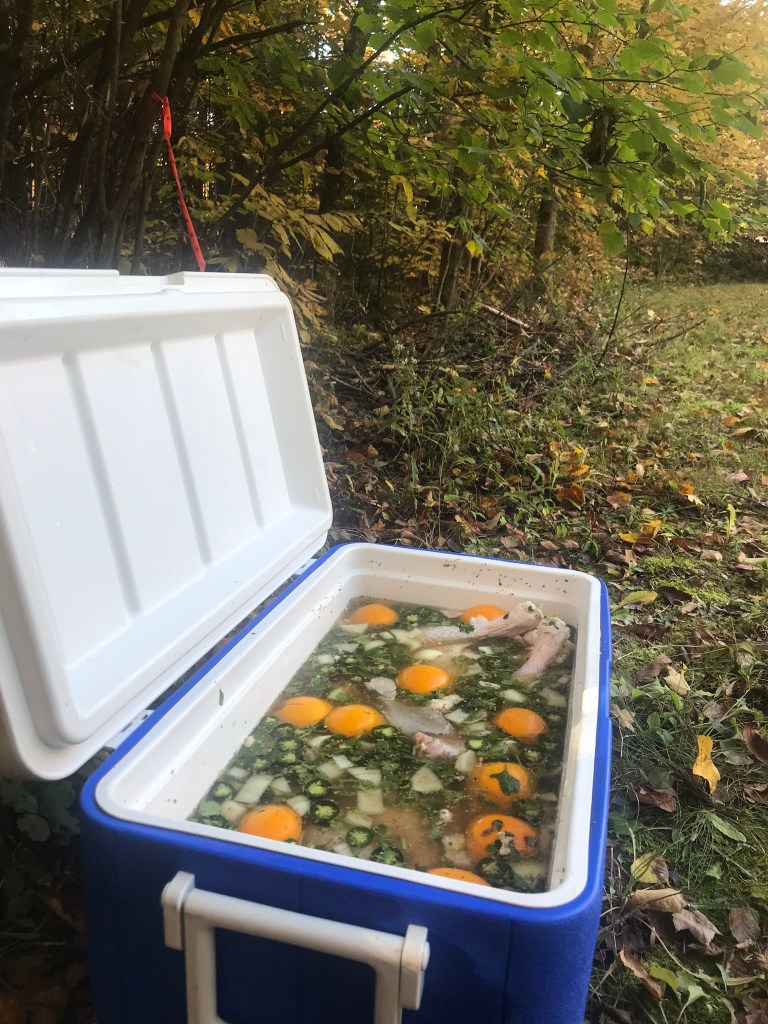
Pre-Work – The Day Before – Brine the Bird
You can omit this step if you wish but it does make more a much more flavourful bird. Think of brine like a marinade… The one I use is at the bottom of this post – it’s by Emeril Legasse (one of my early culinary influences). I have also listed the recipe for his creole seasoning which I use for when cooking turkeys. The instructions and ingredients required are below.
Step 1 Light the charcoal
Fill two charcoal chimneys with charcoal briquettes. light bottom with birch bark/peice of egg carton or crumpled newspaper. Will take 15-20 mins to be ready. Use this time to complete the steps below.

Step 2 – The Stake
Choose an area to cook the turkey. Ideally somewhere sheltered from the wind and without ground material that will catch on fire (ie gravel or sandy soil work will).
Drive stake into ground far enough that when you put your bucket over it there is 1-2 inches of space between the top of the stake and the bucket. Do this by driving the stake in the ground far enough for the bucket to be flush with the ground when you cover the stake. then remove bucket and drive the stake down 1-2″ more. this will create a stable base for the bird. You can also remove a bit of soil away from the base of the stake. this will allow place for the bird to go down a bit if it is a bigger turkey.

Step 3 – Foil the stake and cooking area under the bucket
Using the aluminum foil – tear a strip of foil 18-20″ wide. Poke a small hole in the centre of the foil. Carefully slide the foil down over the stake (the stake goes through the hole). Tear a second strip of foil 6-8″ wide to wrap the stake. Make sure foil it tightly wrapped. there should now be no ground or stake showing. Dry fit the bucket over the stake again to make sure the foil extends beyond the bucket. If your foil does not you can put another layer over the existing foil.
Step 4 – Secure and Season the bird
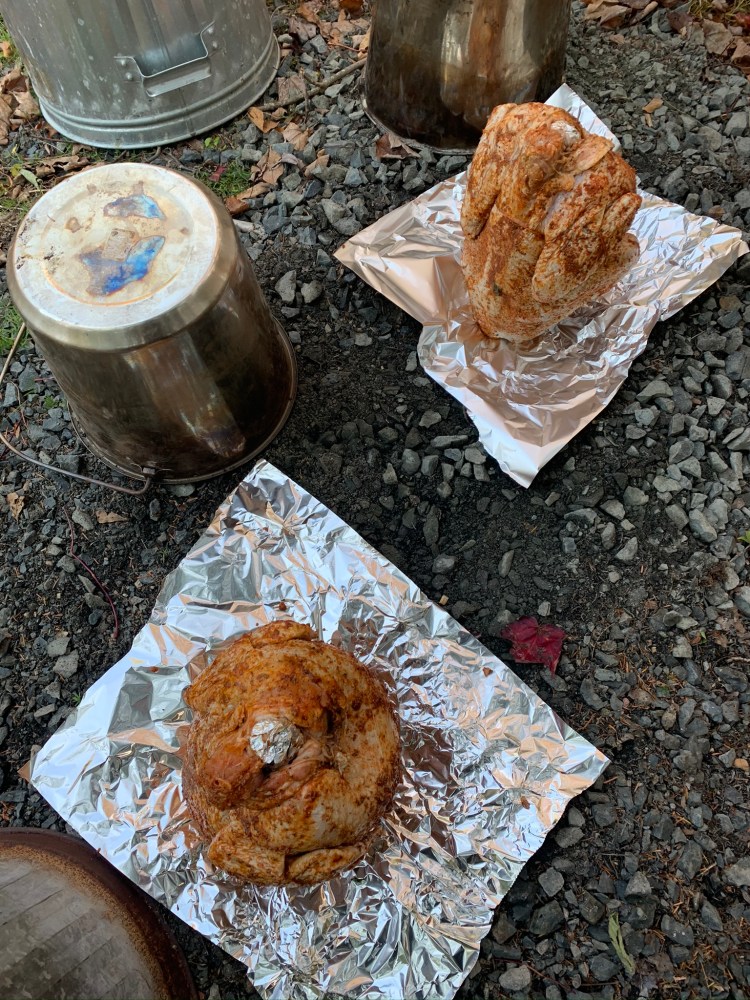
Make sure to truss the bird with butchers twine. There are several videos on youtube on how to properly do this. Doing so will make your life much easier when you go to take the cooked bird off the stake and keep the legs/wings from touching the bucket. Rub the bird with olive oil and season generously with cajun spice.
Place bird on stake but putting the stake through the body cavity with the legs down. See picture below.
Step 5 – Cover the bird
Place the 5 gallon stainless pail over the bird on the stake. Make sure that no part of the turkey touches the bucket as that area may burn if it does.

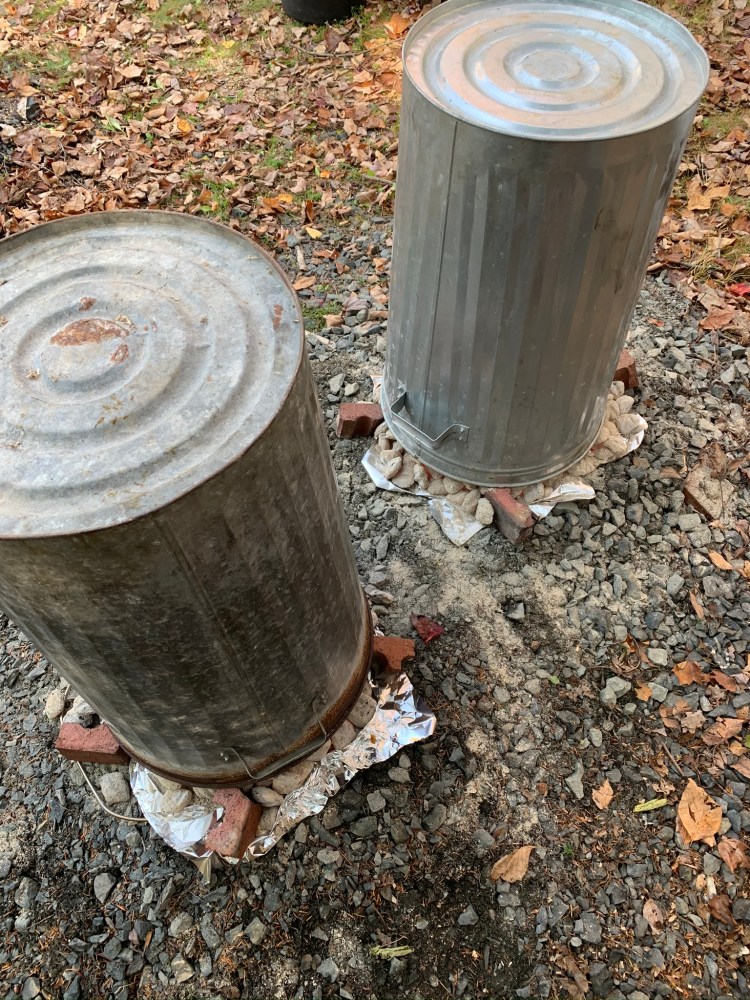
Step 6 Prepping for the charcoal
Tear 2 roughly 18-20″ pieces of foil and tear each of them down the middle. This does not have to be that precise. The pieces are placed at bottom of the outside of the bucket. place it with the long side down along the bottom of the bucket. Continue this until you have gone all around the bucket. This will prevent any ash and dust from getting on your turkey.
Now place the bricks on top of the foil – laying flat. stagger them across from each other (like four points of a compass around the bucket). This keeps the large can elevated and the charcoal still able to get air to burn.
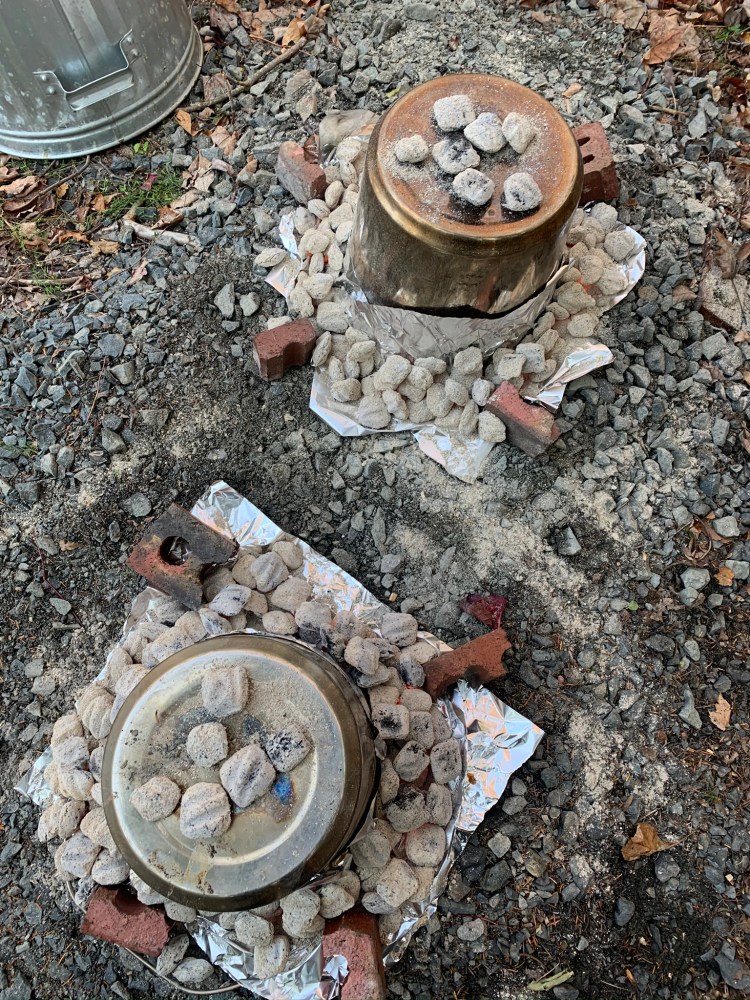
Step 7 – Adding the charcoal
At this point your charcoal should be starting to turn grey and is ready. using a fire proof gloves or oven mitts, place the first chimney of charcoal around the base of the 5 gallon pail (over the foil in step 5). Do the same thing with the second chimney keeping 6-8 briquettes for the top of the bucket.
Step 8 – Cover with the garbage can
Place the large garbage can over the 5 gallon pail with the charcoal. Make sure that it is touching the 4 bricks and the charcoal is still getting air. If there are any charcoal outside the large can – you can push them in gently under the rim so that the heat stays in the can.
Set a timer for 2 hours. during this time, carefully check the outside can periodically to ensure there is still heat. If you are cooking on a windy day you may need to add a 3rd chimney of lit charcoal after an hour but this is rare.
Step 8 – Checking for doneness
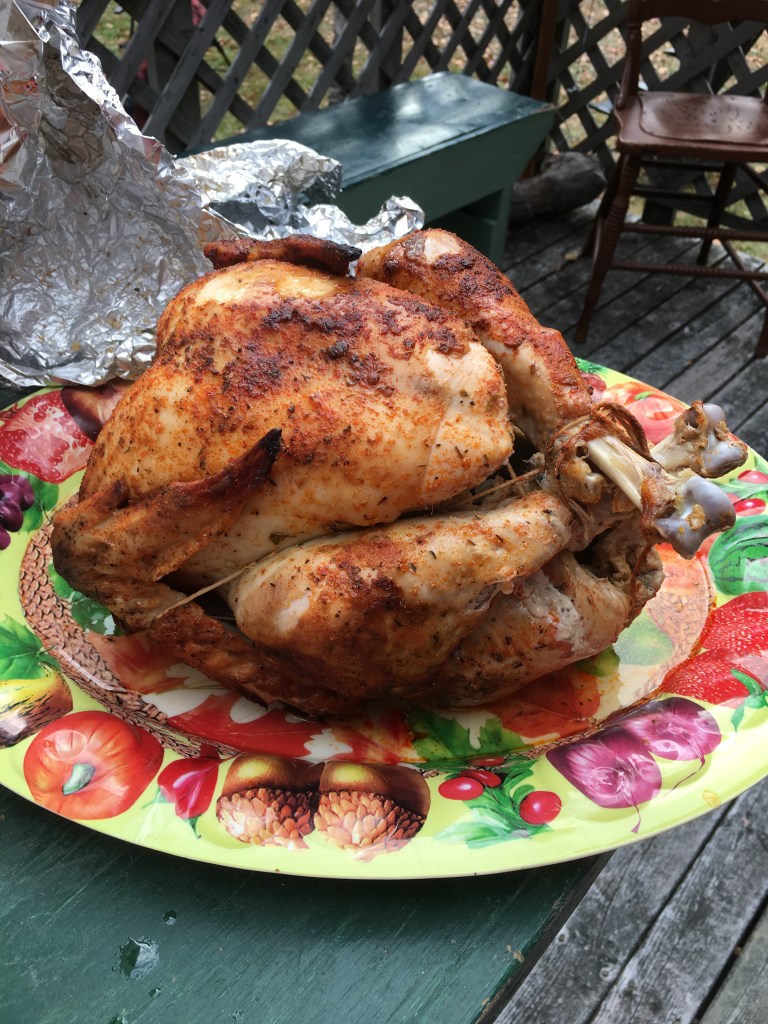
After 2 hours most birds will be done. With oven mitts on, carefully remove the large garbage can and set aside. Using tongs move charcoal away from the outside rim of the inner pail. Pull back the foil around the can just enough to get the pail off to check the temperature of the turkey. Before you remove the inner pail, remove any remaining charcoal from the top of the pail and set aside. Brush any charcoal dust off the top of the can. Carefully remove the pail – it may be stuck to the foil on the ground in places so lift carefully. With the thermometer, check the temperature of the bird by placing the thermometer in the thickest part (without touching the bone). If it is above 180F you are good to pull it off (If it is not – carefully put the bucket back over the bird. move any charcoal back around the pail. then put the large can back over the inner pail and leave for 15-30 mins).
Use clean oven mitts and have someone help you take the bird off the stake and put on a platter then tent loosely with foil for 15 mins before carving.
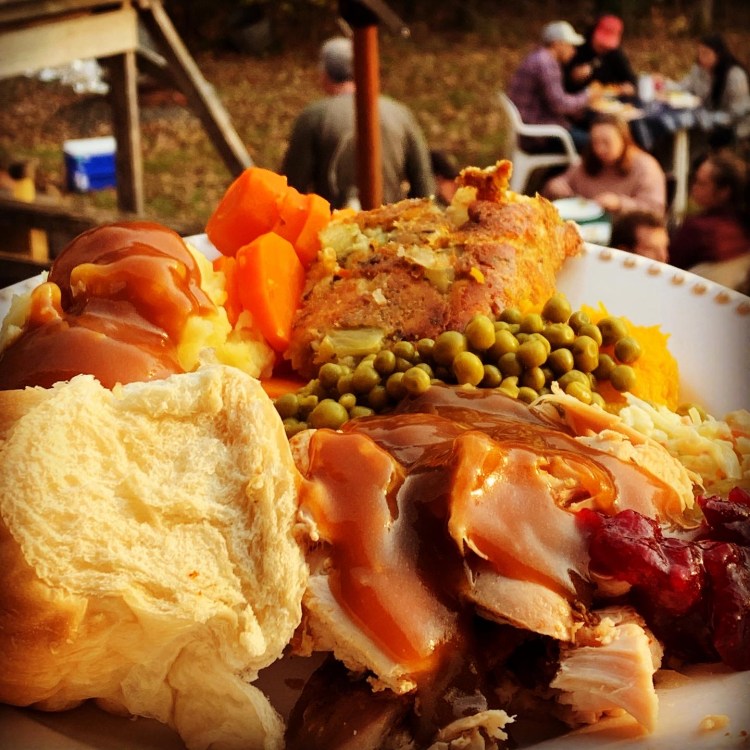
Enjoy!
Additional Tips – from mistakes I have made!
- Make sure Turkey is fully thawed
- Use a thermometer to check temperature
- Don’t try on frozen ground
- You will not get drippings for gravy
- Tie the bird well
- Bones makes best stock
- Don’t peak you will lose precious heat
- Don’t be on a set timeline
- Use charcoal chimneys to light charcoal
- Use charcoal briquettes- as they more even heat
- Make sure to remove any plastic parts from the turkey
- Warm water, soap and towel to wash up
- if your large garbage can is new – you can pre season it the day before. Place 4 bricks on the ground (this will keep can off the ground and let charcoal breath. Light two chimneys of charcoal. Once charcoal is ready (15-20 mins), place the charcoal on the ground in the middle of the bricks then place the garbage can over the charcoal (opening down). This will burn off any residue from the manufacturing process.
Southwestern Turkey Brine
BRINE
2 cup fresh lemon juice
1.5 cups fresh orange juice
2 cup kosher salt
2 cup packed light brown sugar
2 cup chopped yellow onion
4 oranges, halved
4 jalapenos, minced with seeds
1/2 cup chopped fresh cilantro
4 tablespoons chopped garlic
2 tablespoon chili powder
2 tablespoon ground cumin
2 teaspoon dried oregano, preferable Mexican
2 Gallons (7.5L) Water
- In a large non reactive container (I usually use a small cooler – this is the easiest but you need to wash well with warm soapy water when you are done. You can also mix the brine in a large container then dump into doubled garbage bags as well), combine lemon juice, orange juice, kosher salt, light brown sugar, yellow onions, oranges, jalapenos, cilantro, garlic, chili powder, ground cumin and oregano with 2 gallon water.
- Stir well to dissolve brine the sugar & salt.
- Add the turkey to the brine, cover and refrigerate, turning occasionally, for at least 12 hours and up to 24 hours. If using cooler – you can add reusable ice packs to the brine.
Emeril’s Essence Creole Seasoning
2 1/2 tablespoons paprika
2 tablespoons salt
2 tablespoons garlic powder
1 tablespoon black pepper
1 tablespoon onion powder
1 tablespoon cayenne pepper
1 tablespoon dried oregano leaves
1 tablespoon dried thyme

Leave a comment